Whether you're a Drupal beginner or veteran module developer, one thing everyone understands about Drupal is the core block system is very limiting. There are lots of modules out there that attempt to make blocks more robust. Heck, site builders have even used Views as a complete block replacement. There is one module that makes blocks a ton more useful and that is the Bean module (Block Entities Aren't Nodes). The Bean module replaces a lot of modules we used in the past to give blocks more power and function. Drupal 8 even works just like the Bean module out of the box. Instead of using Views or making nodes blocks, Bean gives us fieldable block types.
This tutorial is based on the free Overview of the Bean Module from the Context and Bean - Layout Tools for Your Drupal Toolbox series. A basic understanding of the block system, nodes, and content types in Drupal 7, as well as a local Drupal site running are needed to follow along. Because the video was more of an introduction to the Bean module and it's features, we will do a step by step tutorial on using the features as they are described.
Hands-On
Let's start off by understanding what the Bean module gives us. It basically turns the block system into a mirror of content types for nodes, but for blocks. You have the ability to create different block types, add fields to those, create different blocks, and mange them all much like we do with nodes. In the video tutorial, we are first introduced to the Blocks page where you can add a block. Before we add a block let's jump ahead to the Block types page and create a block type. We will create a block type for an "Image of the Day" block. This block will contain two custom fields, one for an image and one for a description.
- On a Drupal 7 site, with the Bean module installed, navigate to Structure > Block types. Click "Add a block type" and give your new block type the label, "Image of the Day" (you can leave the Description field blank) and click Save Block type to save. You will now be returned to the Block type administrative page where you'll see all your block types listed.
Image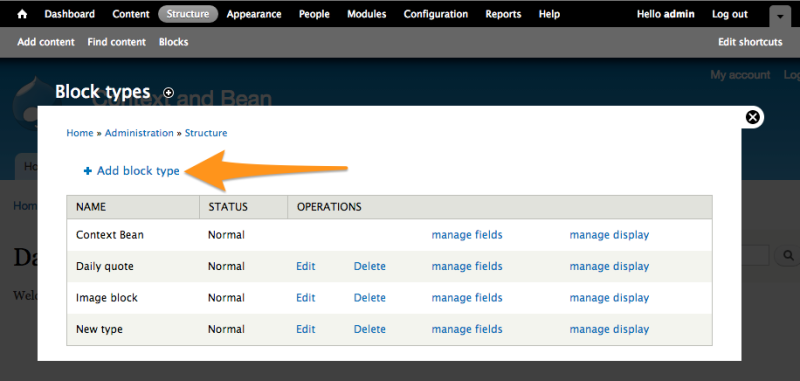
- Now that we have our new "Image of the Day" block type, let's add fields to it. Click "manage fields" next to the block type you just created. Adding fields to blocks is one of the major enhancements the Bean module gives us. We have access to the exact same fields that content types have but we can now add them to blocks. For this tutorial let's add an "Image" field and a "Description" field to our block. For the Image field, use the existing field, field_image, and for the Description field, add a new field called "Description" and use the Text type and Text field widget.
Label Field Type Widget Image Image Image Description Text Text field You can leave all the defaults as you progress through adding the fields. The process should be very familiar as it is identical to adding fields on a content type.
Image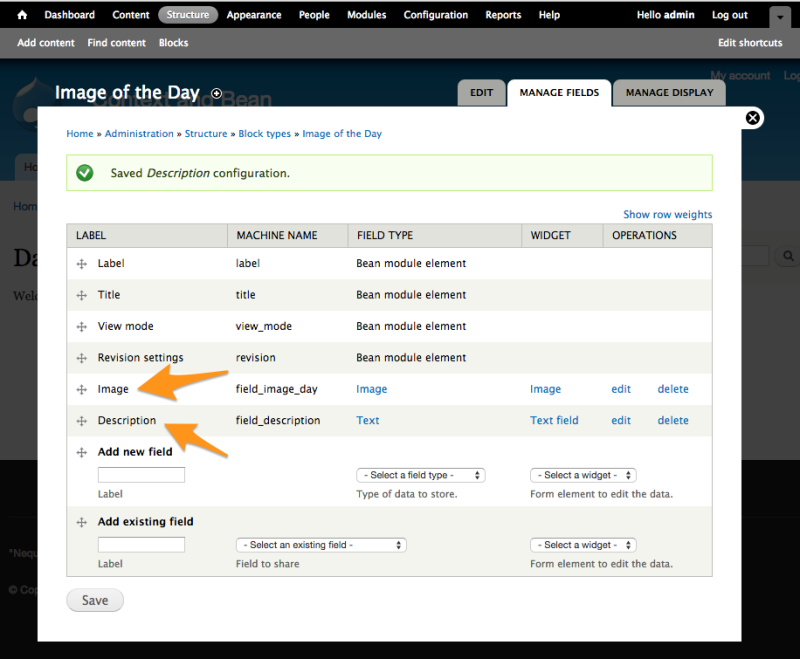
- Now that we have a block type and fields, let's create a block. When you installed Bean, a new shortcut link, "Blocks" should have been added to your shortcut menu. You can click that link or navigate to the administer content page and click on the "Blocks" tab (Content > Blocks). (You'll be rightfully confused if you go to Structure > Blocks. There are now two things on your site called "Blocks". But to create a new "Bean-Block" using your new block type, go to Content > Blocks.)
The "Label" field is a required field set by the Bean module. This field is used to identify your new block on the block placement page. One note I want to mention as you create your first block, is that in the below screenshot there is a field for choosing a View mode. Go ahead and fill this in any way you want, using the default list of View modes. (In order to get more control over view modes you can install the Entity view modes module.)
Image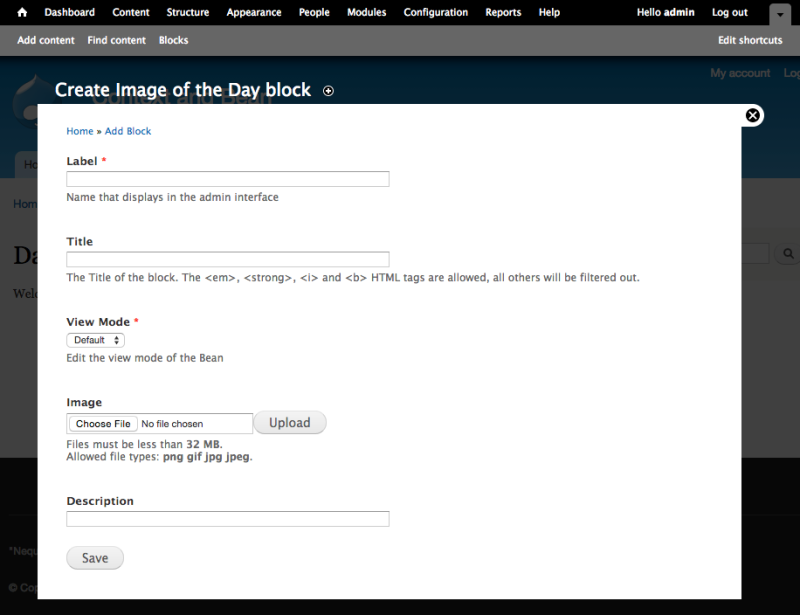
- Now that we have our own custom block with actual content in it, we can place it in a region of our site via the same old block placement page at Structure > Blocks. Voila! You have a new custom block. (The series the video this tutorial is based on though goes over using the Context module to make this a more robust process, so I recommend watching the entire series.)
Summary
Just creating a simple block that contains an image and description isn't rocket science, but if you have ever added modules on top of modules to make blocks more usable it is a welcomed addition. Another huge advantage of the Bean module that I hammer on during the video series is that the configuration that is done for creating block types and adding fields is all exportable.
So if you are looking to make blocks way more useful, and put all your hard work into version control, I highly recommend checking out the Bean module.
Comments
Kyle, I was able to follow your tutorial and create a Picture of the Day block; however, when I try to put a FILE into the block instead of an image, the text shows up but the file control is missing.
Am I doing something wrong?
Thanks and thanks for some great courses.
What exactly are you hoping will show up? If you want a link to the file or a few other options this is controlled in the "Manage Display" for that field. Then in there under the "Format" column you have a dropdown of options for how that file should be displayed. Also, make sure permissions are set for others to see uploaded files.
#3 you don't say how to create bean block, you just assume we know where to go to do that...
Hi Bob, I've updated the article to clarify some things. It is definitely confusing on a Drupal 7 site when you install Bean because there are now 2 things called "Blocks" on your site! To create new content using your new block type that you created (with the Bean module), navigate to Content and click on the Blocks tab. The Bean module should have also created a new shortcut link called "Blocks" which you can use as an alternative. Hope this helps!
Cheers, Amber
Add new comment