
In this tutorial, you will learn how to place panels as a block in any region of your theme using Drupal's Blocks UI and a module packaged within the Panels project: Mini panels. This tutorial is based on a free video in our library, Placing Panels in Blocks with Mini Panels
A common use case for mini panels is "mega menus"—a collection of blocks grouped together that displays as an enhanced menu when the user activates a menu item. But mini panels can be used anytime you want to place panels as a block into any region of your theme, either using the core Blocks UI or contributed module Context. Instead of using the Panels module to create custom content within the primary content region, the Mini panels module allows you to expose panels as blocks that can be placed in any region of a page template, such as a header or footer region.
Assumptions
This tutorial assumes that you have at least an intermediate understanding and familiarity with Drupal, especially Blocks and Menus, that you can download and enable modules using a method of your choice, and that you have some experience or exposure to Panels, even if your only exposure is walking through any of the Panels video tutorials in our Drupalize.Me Library.
What You Will Learn
By the end of this tutorial, you will know how to find and enable the Mini panels module, create a mini panel that uses a 3-column layout containing 3 separate menus, and use the Blocks UI to place this mini panel in the footer region of our theme.
Why Mini Panels?
Panels are useful containers for Views, Menus, Blocks, and other widgets provided by Drupal core or contributed modules. But did you know that you can also expose panels as blocks? This can be a useful option, especially when you want to place panels in specific places in various regions of your theme—outside of the main content region.
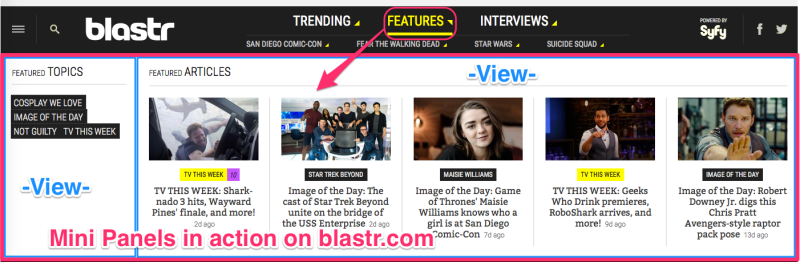
For example, on the recent Lullabot redesign of blastr.com, mini panels containing views are placed as blocks using the Context module. These views leverage taxonomy terms as a contextual argument, and make use of the sitewide context that Context module provides. You can see this in action at blastr.com by activating the visible primary navigation items or by activating the collapsed mobile-friendly menu. (This menu is denoted by 3 horizontal bars, which is colloquially referred to as the "hamburger menu").
What We Are Building
On my Drupal demo site, I want to create an enhanced footer region that displays 3 different menus in 3 separate columns. Even though my site currently uses Panels, the only region that Panels displays content in is the main Content region. The other regions of my theme, such as the header and footer regions, aren't configured to be accessible to Panels.
Additionally, my footer region is a full-width region, but I want to make use of a 3-column panels layout that allows me to place a different menu in each column.
So, is it possible to use panels in the footer region? The short answer is yes! Using the Mini panels module, we can create a mini panel and place it as a block in the footer region using the Blocks UI. Let's get started!
Enabling Mini Panels
Mini panels is a module contained within the Panels project. If you haven't already downloaded Panels, head over to https://www.drupal.org/project/panels and download the latest recommended release.
To enable the Mini panels module:
- In the Administrative Menu, go to Modules
- Locate the Mini panels module in the Panels group
- Check the box next to Mini panels, then click the Save configuration button at the bottom of the page
Creating Our Mini Panel
- From the Admin Menu, go to Structure > Mini panels (admin/structure/mini-panels)
- Click +Add to create a new mini panel
- In the Administrative title field, type "Footer Menus", which generates the machine name of footer_menus
- Complete the Administrative Description field for the benefit of your future self or anyone else wondering about the purpose of this mini panel (e.g.,"Navigation, user, and main menus in a 3-column mini panel.")
- Optional: Add a category to help you organize your mini panels.
- Click Continue
- Optional: Add contexts (none used in this tutorial)
- Click Continue
- On the Layout page, from the Category drop-down, select Columns 3
- Select the radio button for the Three column (33/34/33) layout
- Click Continue
- On the Content page, in the "Left side" region, click the gear then select Add content
- Select Menus on the left then click Navigation then the Finish button
- In the "Middle column" region, click the gear and select Add content
- Select Menus, click User menu, then click the Finish button
- In the "Right side" region, click the gear and select Add content
- Select Menus, click Main menu, then click the Finish button
- Under Live preview, click the Preview button to see the content from each menu displayed in the 3-column mini panel
- Optional: To change the content pane titles (Navigation, User menu, Main Menu), click the gear on the menu pane and select Settings. Check Override Title and enter a title for the pane. To remove the pane title completely, check Override Title and enter <none> into the Title field.
- When you are done configuring your mini panel, click the Finish button on the Content page.
Adding the Mini Panel to the Footer
All mini panels are exposed as blocks. Navigate to the Blocks administration page, and add our new mini panel to the footer region of our theme.
- From the Administrative Menu, go to Structure > Blocks
- Scroll down to the Disabled blocks section and locate the block Mini-panel: "Footer Menus"
- Select the cross-hairs to the left of Mini-panel: "Footer Menus" and drag it to the Footer region. Alternatively, select Footer from the dropdown menu in the center column of the Mini-panel: "Footer Menus" row.
- Click Save blocks
Check Your Work
Now navigate to the home page by clicking the home icon from the Administrative menu, and scroll down to the footer. The footer now shows the three menus we added in our mini panel!
Two Places for Configuration
The important thing to remember is that this component is both a block and a mini panel—that is, the mini panel is exposed as a block. So, configuration can happen in 2 places.
Block Visibility and Configuration
To control visibility settings or decide which page this block should appear on, go to Structure > Blocks and click the Configure link next to the Mini panel block. (If you're using the Context module, the block's visibility and placement settings may be configured using the Context UI instead.)
Mini Panel Configuration
There are several ways to access the mini panel's configuration to add or remove content, add a context, or change layout.
When viewing the mini panel, hover the cursor over the mini panel until a gear appears in the upper right. Select the gear then choose Configure block. From the block's configure screen, there will be a link to Manage the mini-panel. This link will take you directly to the Content settings page in the mini panel administrative section.
You can also access the mini panels from the Administrative menu. Go to Structure > Mini panels. Next to the mini panel you want to edit, from the dropdown menu on the right, select Edit.
One thing to note about the administrative interface for Mini panels, the main navigation: Settings » Context » Layout » Content is not a linear or wizard-type configuration, despite its appearance. You don't have to proceed through these settings from left to right, now that the mini panel has been created. So, to access Content, click the word Content. You can now add or remove content, move panes, or change pane settings.
Resources and Inspiration
This tutorial is also available as a free video, Placing Panels in Blocks with Mini Panels in the Drupalize.Me Library, or you can find it on the Drupalize.Me YouTube channel.
Create Mega Menus with Mini Panels! (What is a Mega Menu? (sitepoint.com).) You can use mini panels to create "mega menus" with the Drupal contributed module Menu Minipanels.
Explore the Lullabot redesign of blastr.com, and check out the sweet mini panels driving the main menu ("hamburger menu") and primary navigation (Trending, Features, Interviews, etc.).