Watching a video can be a big help, but sometimes the best way to learn something is by doing it. Drupalize.Me offers copies of the demo websites we use in our instructional videos. You can download them to your computer, set them up and follow along step-by-step—learning at your own pace. Here’s how to use them.
Prerequisites
Before you can use these files, you will need to have access to a web server where you can set them up. This is most easily accomplished by having a local web server on your own computer. You can also do this on any web server you have access to. You will need to understand the basics of how to set up and install a Drupal site, including knowing where the Drupal files should go on the server, and how to create and import a database. If you need help setting up a local web server (Apache, MySQL, PHP), we have a series of videos that explain the process: WampServer for Windows, MAMP for Mac, and Ubuntu. You can also use the all-in-oneAcquia Dev Desktop package for Windows or Mac.
1. Download the Linked File or Files Below the Video
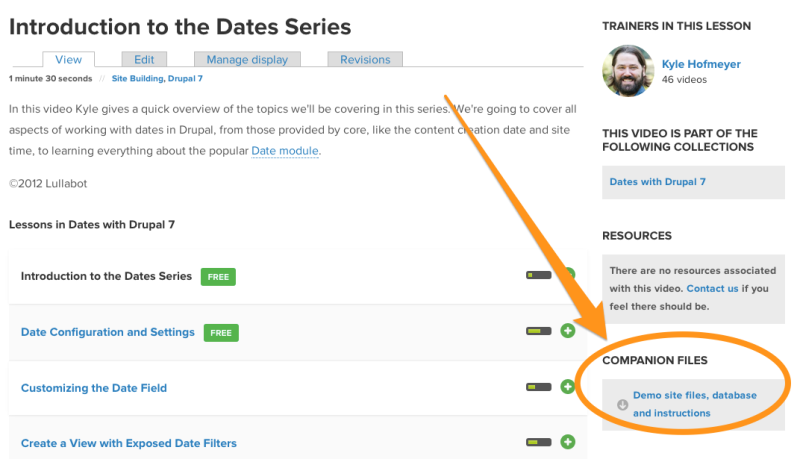
You can find the demo site files under the Companion Files section in the sidebar on a video page that has a demo associated with it. The first video in a series will often have the entirely completed site. Other videos in the series may have demo sites files that are set specifically to the state of material that is covered in that lesson. The files will unzip and create a complete site, including Drupal Core, contributed modules, and a complete database. When it's up and running, the demo site will generate website “snapshots” for each chapter in the video series.
2. Set up your Local Site
Place the site folder in the document root of your web server. For example, if using default MAMP settings on a Mac, you would put the Drupal site folder in /Applications/MAMP/htdocs.
3. Set Up the Database
Most local server environments come with a web application called “phpMyAdmin.” It provides a graphical user interface (GUI) that enables you to easily interact with databases, without knowing SQL. It usually has a link from your local web server’s landing page or control panel. Once you have opened phpMyAdmin, you must create an empty database. Click on the first tab at the left, labeled "Databases."
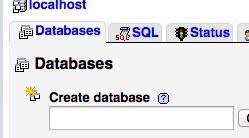
In the center of the screen, there's an input field that allows you to type the name of the database. Name it whatever you like, as long as you remember the name.
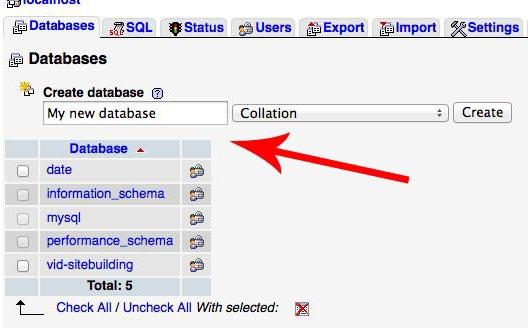
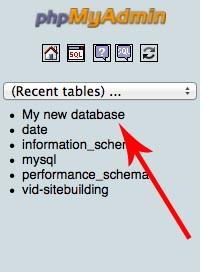
Next, import the downloaded, zipped-up database into the empty one you just created. The zip file’s name will be something like “drupalizeme-projectname.sql.gz.” To import it, go the left-hand column, and click on the name of the database you created.
Then click on the "Import" tab at the top. This will take you to the page shown below. Click on the "Browse" button. This will open a file browser on your local machine. Search out and select the zipped-up database. Leave all other settings on "default."
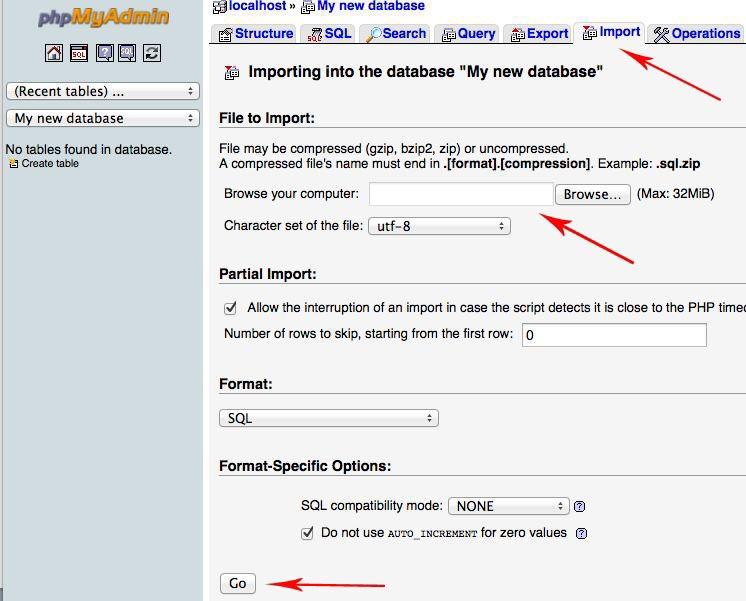
Click the ‘Go’ button at the bottom of the window. It will chew on this for a few seconds while it imports the data. When it finishes, your database is ready to go.
4. Link the Database
In your computer’s file browser, navigate to the document root of your website. Find the "sites/default" folder. You will see a file called "settings.php." The path will look something like this: ..htdocs/projectname/sites/default/settings.php Using a text editor, open "settings.php" and edit the text for the database credentials. Look for the database array.
$databases = array (
  'default' =>
  array (
    'default' =>
    array (
      'database' => 'projectname',
      'username' => 'root',
      'password' => 'root',
      'host' => 'localhost',
      'port' => '',
      'driver' => 'mysql',
      'prefix' => '',
Replace “projectname” with the name you used when you created your database in the preceding step. Replace the corresponding database’s username and password as well.
5. Fire it Up!
Open your browser and go to the main landing page that lists all of your sites. It is often located at http://localhost (or http://localhost:8888 with a default installation of MAMP on Mac). Find the folder with your website, click it to go to the site, and login with the following credentials: username = admin, password = admin.
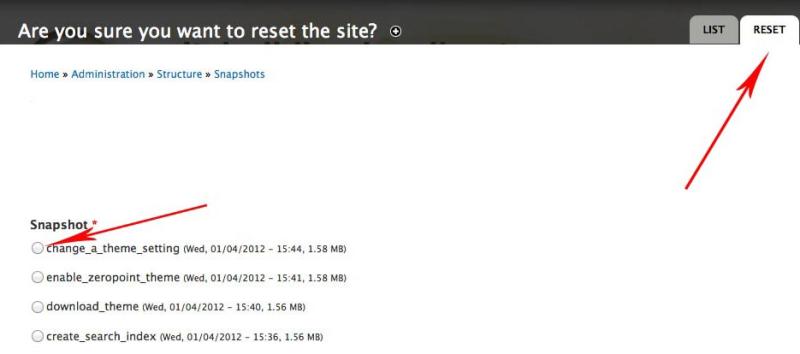
6. Navigating from Chapter to Chapter
We use the Demonstration Site module to create “snapshots” for each chapter. To get to the Snapshots page, go to the administrative toolbar and click Structure > Snapshots. To load a Snapshot, go to the tabs in the upper right-hand corner of the page and select "Reset" (admin/structure/demo/reset). Select the radio button for the chapter you want and click the "Reset" button at the bottom of the page.