One of the ways you can create a REST endpoint in Drupal is by using Views. In this tutorial, we'll add a REST endpoint display to a view of baseball players. We'll examine and configure settings that are unique to the REST endpoint display.
By the end of this tutorial you should be able to:
- Add a REST endpoint display to a view
- Understand how to configure settings for an endpoint
Goal
Add a REST endpoint display to a view.
Prerequisites
To follow along with this tutorial, you should have Drupal installed with our database starting point imported. This will start you out with content and views that you can work with in this tutorial.
If you are new to Views, check out these User Guide tutorials as well:
Watch: Add a REST Endpoint with Views
Add a REST export display to the view of baseball players
With the help of some Drupal core modules, we can add a custom JSON endpoint to a Drupal site. In our case, we want to make our set of baseball players data consumable by other websites or apps. We'll do this by adding a new REST export display to our existing Baseball Players view.
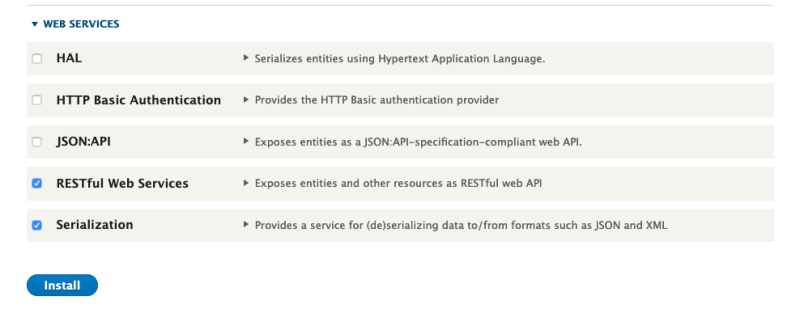
Install required modules
On Extend, locate the Web Services group of modules. Select the checkbox next to each of these modules (if not already selected), the select the Install button at the bottom of the page:
- RESTful Web Services
- Serialization
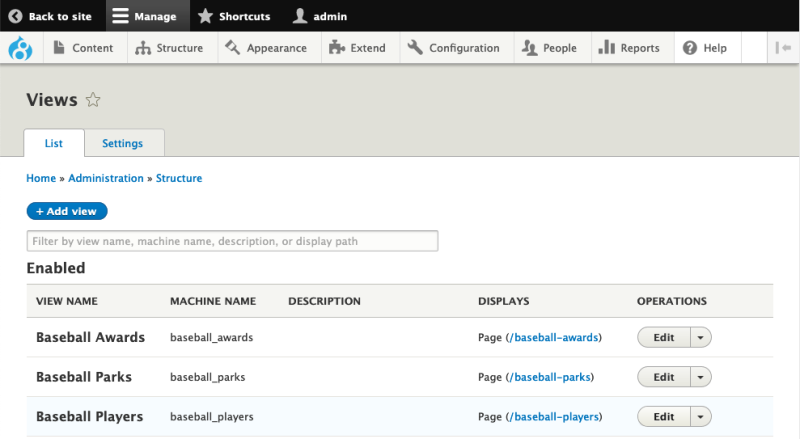
Edit view
Now we're ready to add a new display to our view. Navigate to the Structure > Views (admin/structure/views). From our list of views, locate the view named Baseball Players and select Edit in the Operations column.
Add a REST export display
Near the top of the page, locate the Displays area. We have one display, Page. Next to the display named Page, select the + Add button to show a dropdown menu of the available display plugins.
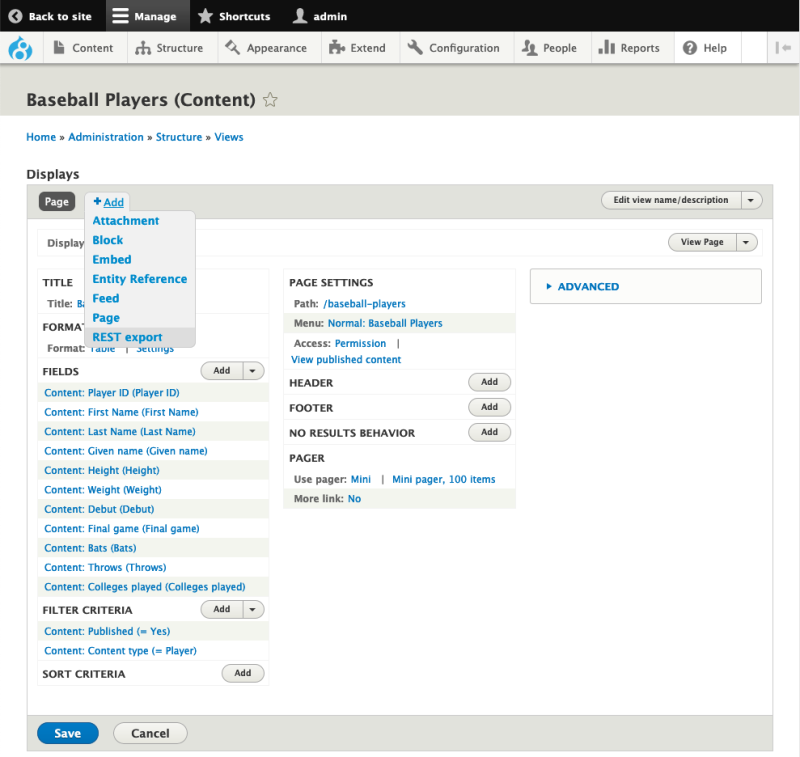
From the display dropdown list, select REST export. This will cause the page to reload. Once the reload is complete, there will be a new display, REST export listed on our view next to Page, which is now ready to edit in the Views UI. (When you add a new display to a view, the Views UI will automatically switch you to that new display.)
(You'll see an error message that says that the display uses a path but the path is undefined. We'll be configuring the path in a later step.)
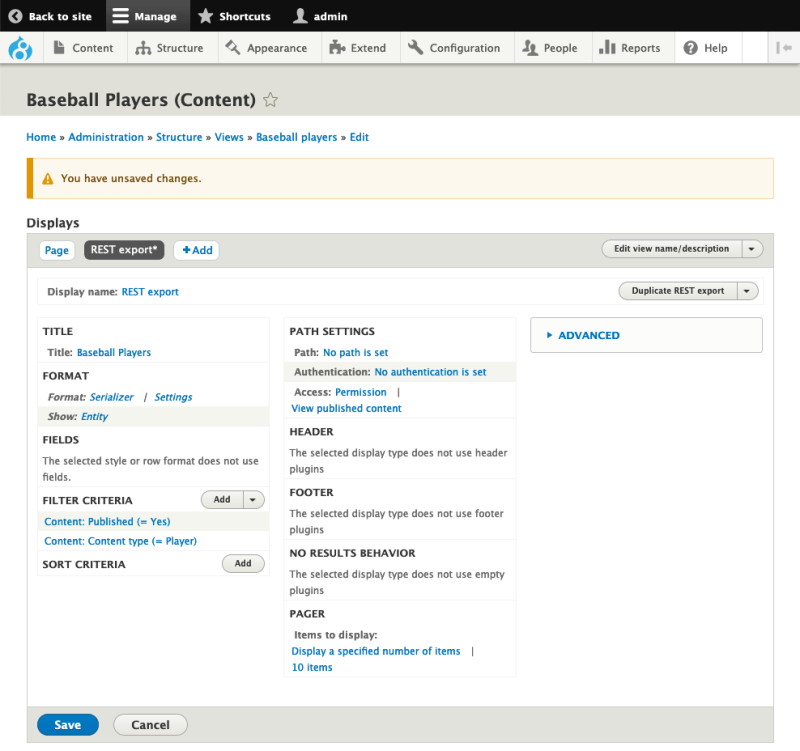
Configure serializer format settings
Let's take a moment to look at the Format section of our view's edit page. The current format for our new display is Serializer. This means the output for this display is going to be text that represents a more complex data structure.
Next to the Serializer format, select the Settings link. This will open a new modal window where we can configure which serialization format we would like our view to output.
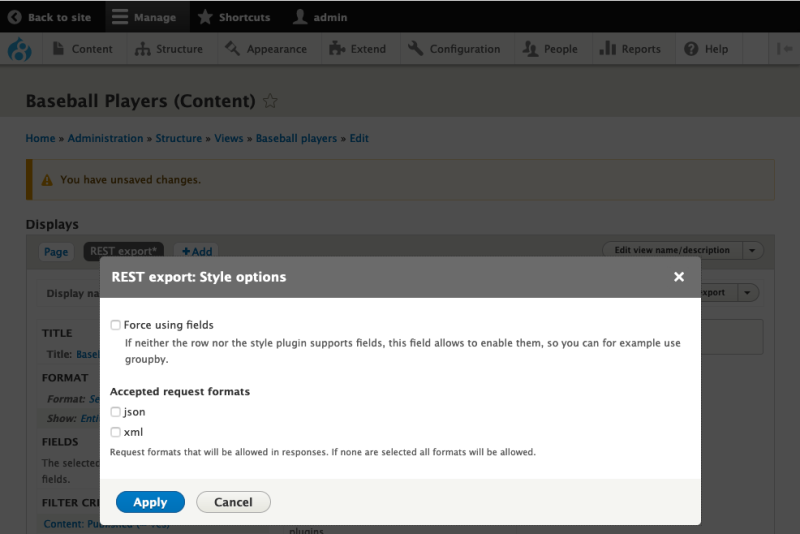
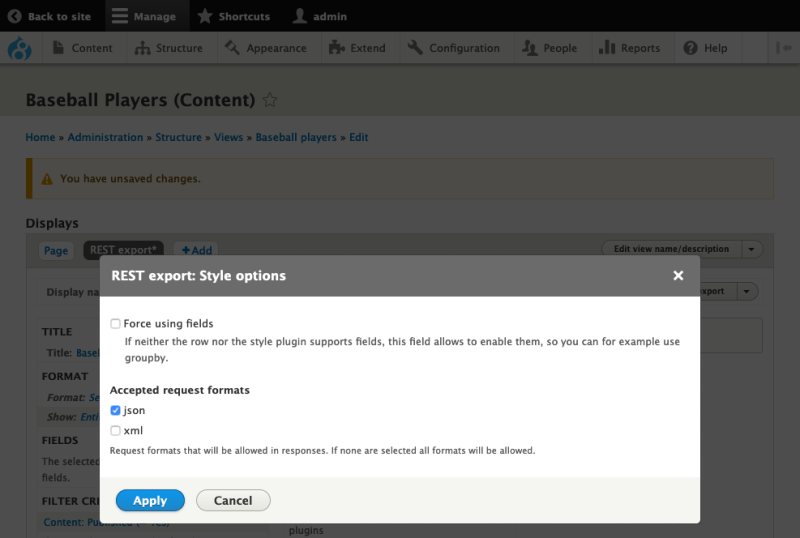
Here we can configure the serialization format. Since we want our data to be available as JSON, select the checkbox labeled json beneath the Accepted request formats label. Select the Apply button.
Change format Show value from Entity to Fields
Still in the Format section of the edit screen, locate the Show label. By default it's set to Entity. We want to change that to Fields so that we have more control over the data provided to the REST export display.
Select the Entity link next to Show in the Format section.
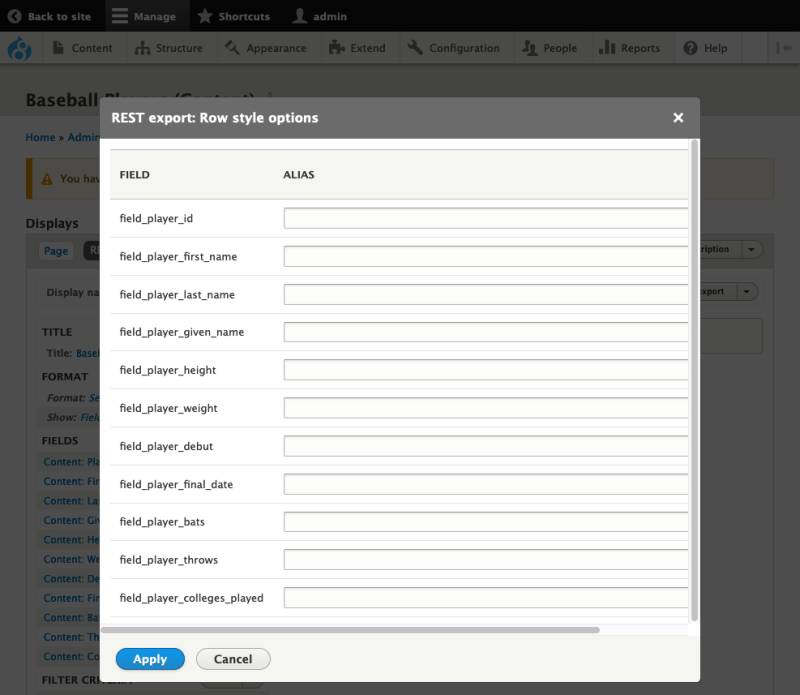
Within the modal window, select the Fields radio button. Now select the Apply (this display) button.

This will open a new modal window where we can configure how our data is output even further. Out of the box, the REST export: Row style options allow you to provide an alias for each field shown in our data. This is a useful setting for simplifying the output of our display for consumers, but for now select the Apply button to continue without configuring any aliases.
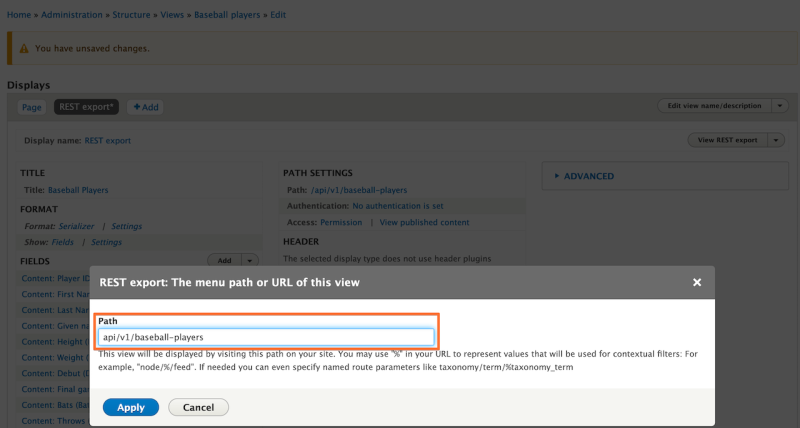
Configure display path
With our output configured, we need to provide a path for the our REST endpoint. In the Path Settings section of the view edit screen, locate the label Path. By default its value is No path is set. Select the No path is set link to set a path value.
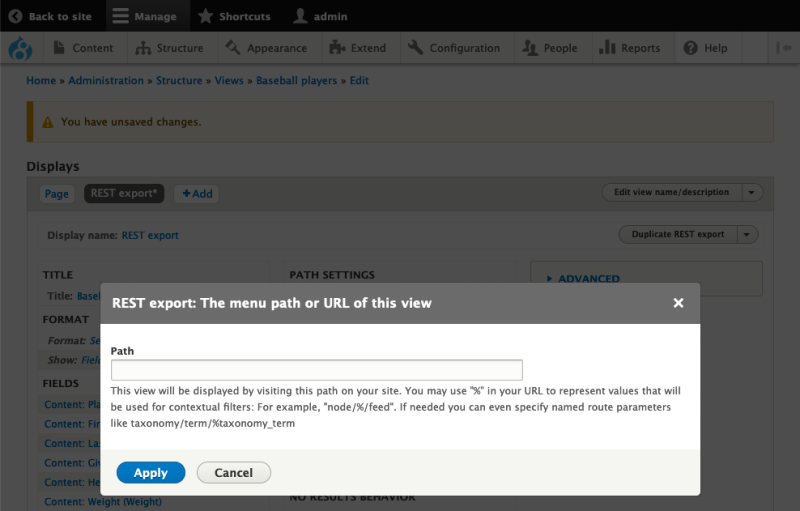
It's common practice to begin an API endpoint path with api followed by a version number, e.g. v1 or 1.0, then some path that describes the data. For example, we could set the path to api/v1/baseball-players.
Change the value of the Path field to api/v1/baseball-players, then select the Apply button.
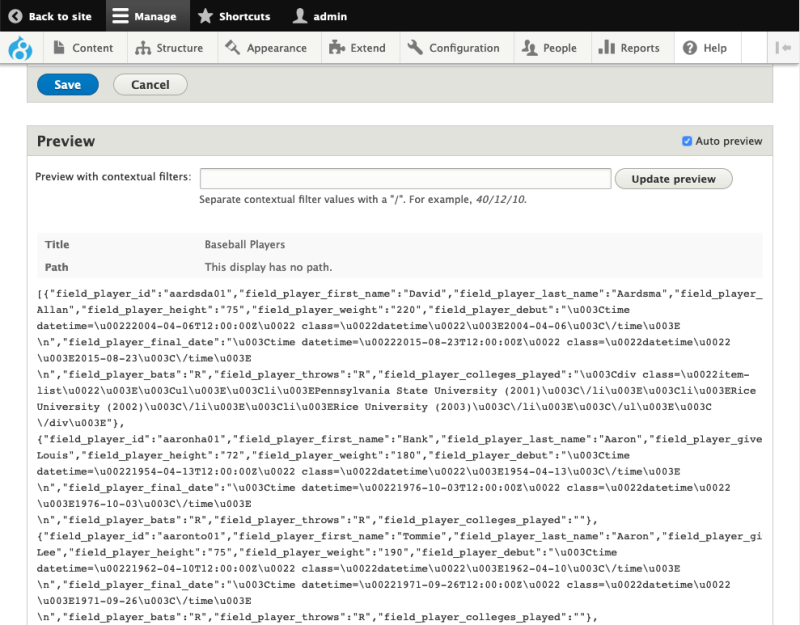
Now we are able to preview our display output. Scroll down to the Preview area. Notice that the view looks like a lot of plain text code. You might recognize the unformatted text as JSON. That's perfect! We've created a REST export display that outputs JSON data using the Views module.
Save the view
Select the Save button. Let's look at our new REST display in action.
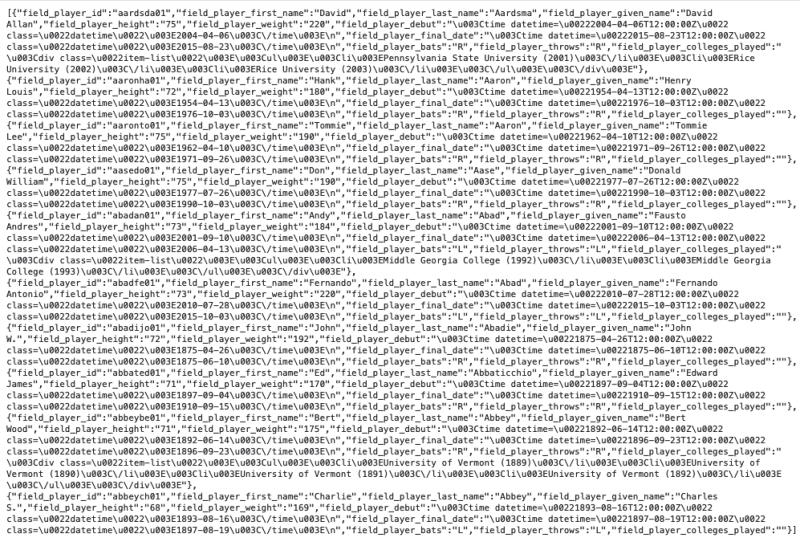
There we have it. We've added a new REST export display to our view that provides a list of baseball players as JSON data. If we navigate to the path that we configured for our display, we can see our data output as JSON.
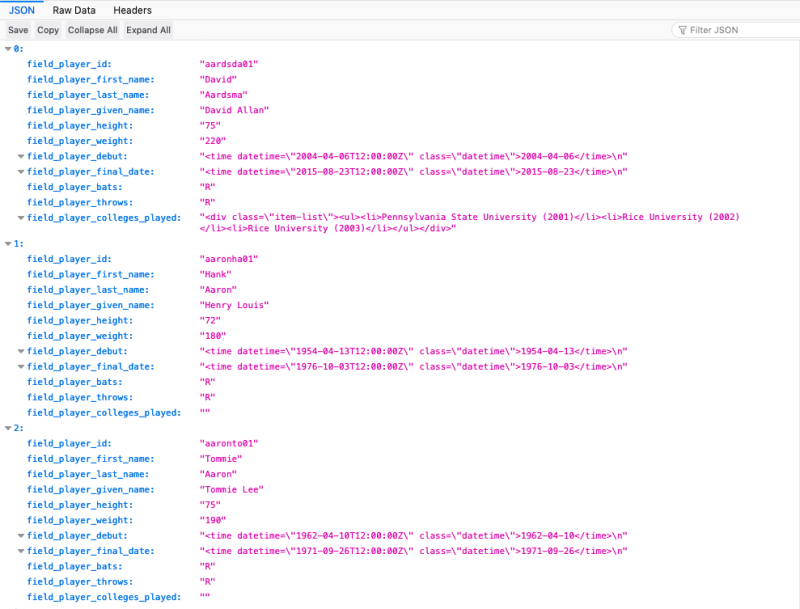
Note: If you often find yourself reviewing JSON data in your browser, look for a good browser plugin that can make this data much easier to read. Here is a screenshot of the same dataset with a JSON browser extension enabled.
Recap
Adding displays to a view is a way to present an existing view in another way on your site. In this exercise we have learned a lot about adding displays to views by creating a new REST export display. Now our baseball player data has a consumable API, accessible to other systems, websites, and apps.
Further your understanding
- Add REST export displays to our other views that display baseball data.
Additional resources
- What Are Web Services? (Drupalize.Me)