Image
Writing a React application requires including the React JavaScript library in the page, writing some React-specific JavaScript, and then binding it to a specific DOM element on the page. You may also want to include existing packages from the npm ecosystem, and use modern JavaScript (ES6+) features, which necessitates setting up a build toolchain for your JavaScript using a tool like Webpack or Parcel.
There are a lot of different ways you could go about setting this all up. Do you add React via a theme or a module? Do you need a build tool? Should you use Webpack, or Babel, or Parcel, or something else? While we can't possibly cover all the different approaches, we can help you figure out what is required, and you can adapt our suggestions to meet your needs.
In this tutorial we'll:
- Create a new custom theme with the required build tools to develop React applications
- Add a DOM element for our React application to bind to
- Create a "Hello, World" React component to verify everything is working
By the end of this tutorial you'll know how to configure everything necessary to start writing React within a Drupal theme.
Goal
Connect a "Hello, World" React application to a Drupal theme or module.
Prerequisites
- Drupal installed and a couple of Article or Page nodes created and published on the home page
- Know how to create and edit a Drupal theme
- Or, how to create a custom Block plugin
- Basic JavaScript, ECMAScript 5 or higher
- React Basics
Example code
Code for this example can be found in the Git repository https://github.com/DrupalizeMe/react-and-drupal-examples. The hello-world branch contains just the setup from this tutorial, and none of the code from other examples, which may serve as a better starting point for your own custom code. The code repository uses Drupal 8, but these examples have also been tested in Drupal 9.
How things connect
To add React to a Drupal module or theme we need to do a couple of things:
- Use an asset library to add the React JavaScript library
- Include our custom JavaScript code that uses the React library via an asset library
- Modify the HTML of the page and add a DOM element like
<div id="react-app">for our React application to bind to
It's possible to add the React library via a plain <script> tag in your HTML, like you might have included jQuery in the past. However, we couldn't come up with any real-world scenarios in which you would do this to add React to a Drupal module or theme. Our example code demonstrates how to do it if you really want to know.
We think that in most cases you'll want to set up a build toolchain for your React (and other JavaScript). This will allow you to include 3rd-party packages from npm, scale your application to many files and components, enable live editing in development mode, and help optimize things for speed and compatibility.
Set up a new theme
For this example we'll create a new theme and add our JavaScript to the theme. You could also opt to do these same steps in an existing theme, or as part of a custom module.
Create an .info.yml file
In the /themes directory create a new subdirectory named react_example_theme/. Then create a new file named react_example_theme.info.yml with the following contents:
name: React Example Theme
type: theme
description: 'A theme that loads React JavaScript libraries, and a basic React application.'
core_version_requirement: ^9.5 || ^10
base theme: olivero
Note: We're using Olivero as a base theme here for demonstration purposes only.
Enable the new theme
Enable the theme by navigating to Appearance (admin/appearance) in Manage administration menu. Then press the Install and set as default link for the React Example Theme theme.
Initially, things won't look any different as all we've done is create a sub-theme of Olivero. We'll add some customizations in a moment.
Create a custom React script
To test that everything is working we can create a "Hello, World" React component.
- Create a js/src/ directory in your theme for your JavaScript if you haven't already, e.g. /themes/react_example_theme/js/src.
- Create a new file called index.jsx: /themes/react_example_theme/js/src/index.jsx.
- Add the following "Hello, World" sample React script to your index.jsx file:
import React from 'react';
import ReactDOM from 'react-dom';

// # Example 1: Simple "Hello, World" code
ReactDOM.render(
  <h1>Hello there - world!</h1>,
  document.getElementById('react-app')
);
In this hello world React code example the ReactDOM.render() (i.e. virtual dom) will look for an HTML element with the ID react-app, and replace it with the HTML markup produced by your React code. This is also known as binding the React application to the DOM.
Set up a JavaScript toolchain with Webpack
There are a lot of possible tools you can use to do this. We'll provide an example that uses Webpack. But you should be able to set up a toolchain using Parcel, Gulp, or your tool of choice following a similar recipe.
At a high-level what we're doing is configuring a process that'll take our source JavaScript files, like index.jsx, and pass them through different build steps that will ultimately output a single, optimized, .js file. Using this build step allows us to take advantage of the entire React/JavaScript ecosystem while working on our Drupal module or theme.
The basic steps are:
- Set up a toolchain that'll process your JavaScript assets into one or more "bundled" JavaScript files with a known location that doesn't change
- Create a Drupal asset library that points to the bundled assets from your build toolchain
Almost any JavaScript build tool chain will require the use of Node.js and npm. We'll assume you've got those installed already and are comfortable using them. If not, check out Install Node.js Locally with Node Version Manager.
For this example we're going to use Webpack to execute Babel on our source files and save the resulting bundled assets. To do this we'll:
- Install React, Webpack, Babel and other required npm packages
- Configure Webpack
- Configure Babel
- Define a Drupal asset library to include the compiled JavaScript assets
- Add some helper scripts to our package.json to make development easier
The following setup assumes that your source JavaScript files are going to live in the react_example_theme/js/src directory, and the entry point for your JavaScript code will be: react_example_theme/js/src/index.jsx (which we created above).
Install React, Webpack, and Babel
In your terminal run the following commands from the root directory of your theme, themes/react_example_theme/:
# Create a package.json if you don't have one already.
npm init -y
# Install the required dependencies
npm install --save react react-dom prop-types
npm install --save-dev @babel/core @babel/preset-env @babel/preset-react babel-loader webpack webpack-cli
Configure Webpack with a webpack.config.js file
Create a webpack.config.js file in the root of your theme.
themes/react_example_theme/webpack.config.js:
const path = require('path');
const isDevMode = process.env.NODE_ENV !== 'production';

const config = {
  entry: {
    main: ["./js/src/index.jsx"]
  },
  devtool: (isDevMode) ? 'source-map' : false,
  mode: (isDevMode) ? 'development' : 'production',
  output: {
    path: isDevMode ? path.resolve(__dirname, "js/dist_dev") : path.resolve(__dirname, "js/dist"),
    filename: '[name].min.js'
  },
  resolve: {
    extensions: ['.js', '.jsx'],
  },
  module: {
    rules: [
      {
        test: /\.jsx?$/,
        loader: 'babel-loader',
        exclude: /node_modules/,
        include: path.join(__dirname, 'js/src'),
      }
    ],
  },
};

module.exports = config;
This webpack.config.js uses the isDevMode variable to modify the configuration depending on whether you're running in "development" mode or "production" mode. When running in "development" mode we want to include source maps, and maybe other debugging information, in our builds. But we do not want those files to end up getting committed to the repository. So for "development" mode we change the output directory where the compiled files get saved to themes/react_example_theme/js/dist_dev. Then we add that directory to our .gitignore file to ensure development assets are never committed. This isn't required, but it's a good idea we picked up from this post by Sam Mortenson.
Configure Babel with a .babelrc file
Provide some configuration for Babel by creating an .babelrc file with the following content in the root directory of the theme.
themes/react_theme_example/.babelrc:
{
  "presets": [
    "@babel/preset-env",
    "@babel/preset-react"
  ]
}
Define a Drupal asset library
Next we need to define two new Drupal asset libraries that can tell Drupal where to find our JavaScript files. Create a themes/react_example_theme/react_example_theme.libraries.yml file, and add the following:
react_app:
  version: VERSION
  js:
    js/dist/main.min.js: {minified: true}

react_app_dev:
  version: VERSION
  js:
    js/dist_dev/main.min.js: {minified: true}
This adds two new asset library definitions which point to the .js files that are created as a result of our Webpack toolchain. Note that if you've chosen to not use the js/dist_dev trick you only need to include the first asset library definition here.
Automatically swap asset libraries in development
If you are using the js/dist_dev trick you'll also need to add the following to your theme's {THEMENAME}.theme file so that Drupal will switch between the production and development JavaScript assets when running locally. Learn more in Add Logic with THEMENAME.theme.
Create react_example_theme/react_example_theme.theme:
<?php

/**
 * Implements hook_page_attachments_alter().
 */
function react_example_theme_page_attachments_alter(array &$attachments) {
  // Use the dev library if we're developing locally.
  if (in_array('react_example_theme/react_app', $attachments['#attached']['library']) && file_exists(__DIR__ . '/js/dist_dev')) {
    $index = array_search('react_example_theme/react_app', $attachments['#attached']['library']);
    $attachments['#attached']['library'][$index] = 'react_example_theme/react_app_dev';
  }
}
This code dynamically replaces all uses of the react_app asset library with the react_app_dev asset library at runtime if the js/dist_dev directory exists.
Create the _js/dist and js/dist_dev directories
In your theme directory, create js/dist and if you're using the js/dist_dev trick, create js/dist_dev as well.
Tell Git to ignore development files
Update your project's .gitignore file to exclude themes/react_example_theme/js/dist_dev.
Add some helper scripts
Let's add some helper scripts to our package.json to make it easier to launch Webpack (you can replace the following with the existing scripts object which contained a test key that we added earlier):
"scripts": {
  "build": "NODE_ENV=production webpack",
  "build:dev": "webpack",
  "start": "webpack --watch"
}
Now, from the root directory of our theme, themes/react_example_theme/, we can run the following commands:
npm run build: Build a production-ready set of JavaScript assets and save them into the js/dist directory. Do this whenever you're ready to deploy your changes, and then commit the updated files to Git. Or, include the execution of this command in your CI build pipeline.npm run build:dev: Build a development copy (including source maps) of the JavaScript assets and save them into the js/dist_dev directory.npm run start: Start Webpack using--watchwhich will cause it to listen for changes to any of the files in js/src and automatically rebuild the assets in js/dist_dev as needed. Useful when doing development.
Here's what your final package.json should look like if you followed the steps above. Note that we updated the main key's value to "main": "js/src/index.jsx" so that it points to our projects JavaScript entry point. This property isn't actually used at all in our setup, but this keeps it consistent with a standard package.json file configuration. Your package.json file may contain other content depending on your specific use case.
{
  "name": "react_example_theme",
  "version": "1.0.0",
  "description": "",
  "main": "js/src/index.jsx",
  "scripts": {
    "build": "NODE_ENV=production webpack --mode=production",
    "build:dev": "webpack",
    "start": "webpack --watch"
  },
  "keywords": [],
  "author": "",
  "license": "ISC",
  "devDependencies": {
    "@babel/core": "^7.23.9",
    "@babel/preset-env": "^7.23.9",
    "@babel/preset-react": "^7.23.3",
    "babel-loader": "^9.1.3",
    "webpack": "^5.90.1",
    "webpack-cli": "^5.1.4",
  },
  "dependencies": {
    "prop-types": "^15.8.1",
    "react": "^18.2.0",
    "react-dom": "^18.2.0"
  }
}
Add any other Webpack configuration
Webpack can do so much more than compiling JavaScript files, and your toolchain is by no means limited to what we've configured above. For example, we could add compiling Sass to CSS, optimizing images, and allowing type-checking with TypeScript.
Check out the Webpack Guides for some examples.
Additional examples
- Adding Webpack to a traditional Drupal theme (thinkshout.com)
- A Recipe for an Embedded React Component in Drupal (mediacurrent.com)
- Using Webpack to Unleash Your Drupal 8 Project with Modern JavaScript (shinesolutions.com)
After following these steps you're all set to have Babel transpile your JavaScript, so you can use JSX and ES6+ features in your code. Webpack will bundle your custom code along with the required React, and ReactDOM libraries, as well as any other libraries you include using npm, into a single JavaScript bundle.
To start developing, run the npm run start command. Any changes will be automatically compiled, and you can refresh the page to see the result. When you're ready to deploy your changes run npm run build and commit the resulting files in the js/dist/ directory of your theme.
Learn how to add hot module reloading (HMR) to your webpack configuration to see edits to React components immediately displayed in the browser with no refresh required in Add Webpack Hot Module Replacement (HMR) to a Drupal Theme.
Include the asset library on one or more pages
At this point you should have an asset library named react_example_theme/react_app, which points to the JavaScript files created by webpack. The next step is to attach the asset library (and thus the JavaScript) to one or more pages, and add a DOM element for your React application to bind to.
In our example we'll override the page.html.twig template to add a <div> into the sidebar. Our React application will render in the sidebar above any configured blocks.
Copy core/themes/olivero/templates/layout/page.html.twig into themes/react_example_theme/templates directory and clear the cache. (Navigate to Configuration > Performance (admin/config/development/performance) and select Clear all caches.)
In themes/react_example_theme/templates, find this, which renders the main content area:
{% if page.sidebar %}
  <div class="sidebar-grid grid-full">
    <main role="main" class="site-main">
      {{ page.content_above }}
      {{ page.content }}
    </main>

    {{ page.sidebar }}
  </div>
{% else %}
  <main role="main">
    {{ page.content_above }}
    {{ page.content }}
  </main>
{% endif %}
And replace it with this, which adds a <div id="react-app"></div> to the <main> content area whether there is a sidebar or not:
{% if page.sidebar %}
<div class="sidebar-grid grid-full">
  <main role="main" class="site-main">

    <div id="react-app" class="block">React app will load here.</div>

    {{ page.content_above }}
    {{ page.content }}
  </main>

  {{ page.sidebar }}
</div>
{% else %}
  <main role="main">

    <div id="react-app" class="block">React app will load here.</div>

    {{ page.content_above }}
    {{ page.content }}
  </main>
{% endif %}
Then, include the asset library by editing the react_example_theme.info.yml file to include the following:
libraries:
  - react_example_theme/react_app
Finally, clear the cache.
This will ensure that the react_example_theme/react_app asset library loads on every page that uses the react_example_theme theme.
Learn more about:
- Overriding template files in Override a Template File
- Attaching asset libraries to the page in Attach a Library
Alternative approach: define a block plugin
Another approach would be to define a new block plugin that outputs the DOM element to bind to, and attach the React application asset library to that block. Then whenever the block appears on the page the React application will load.
Example modules/react_example/src/Plugin/Block/ReactExampleBlock.php:
<?php
namespace Drupal\react_example\Plugin\Block;

use Drupal\Core\Block\Attribute\Block;
use Drupal\Core\Block\BlockBase;
use Drupal\Core\StringTranslation\TranslatableMarkup;

/**
 * Provides a 'ReactExampleBlock' block.
 */
#[Block(
  id: "react_example_block",
  admin_label: new TranslatableMarkup("React example block"),
)]
class ReactExampleBlock extends BlockBase {

  /**
   * {@inheritdoc}
   */
  public function build() {
    $build = [];
    $build['react_example_block'] = [
      '#markup' => '<div id="react-app"></div>',
      '#attached' => [
        'library' => 'react_example/react_app'
      ],
    ];
    return $build;
  }
}
Learn more about:
- Creating Block plugins in Implement a Plugin Using PHP Attributes
- Attaching asset libraries to the page in Attach a Library
And finally, confirm that it's working
After making all the changes above you'll have created, or modified these files either directly or by running the build toolchain:
.
├── js
│   ├── dist
│   │   ├── main.min.js
│   │   └── main.min.js.map
│   ├── dist_dev
│   │   ├── main.min.js
│   │   └── main.min.js.map
│   └── src
│       └── index.jsx
├── node_modules/
├── package-lock.json
├── package.json
├── react_example_theme.info.yml
├── react_example_theme.libraries.yml
├── react_example_theme.theme
├── templates
│   └── page.html.twig
└── webpack.config.js
With the changes to our theme, or the addition of a new block, we should be able to see our React application load on the page and confirm this is all working. Load any page on your site, and you should now see the text "Hello there - world!" from our React component rendered at the top of the sidebar.
<drupal-media data-entity-type="media" data-entity-uuid="2d3937cb-3082-47fe-b4ab-9f61fcc55344" alt="Screenshot of Drupal page with "Hello there - world!" content rendered by React highlighted">
Edit your JavaScript file and refresh.
Disable caches to see changes
If you're not seeing changes after a page refresh, there are several different kinds of caches you can disable.
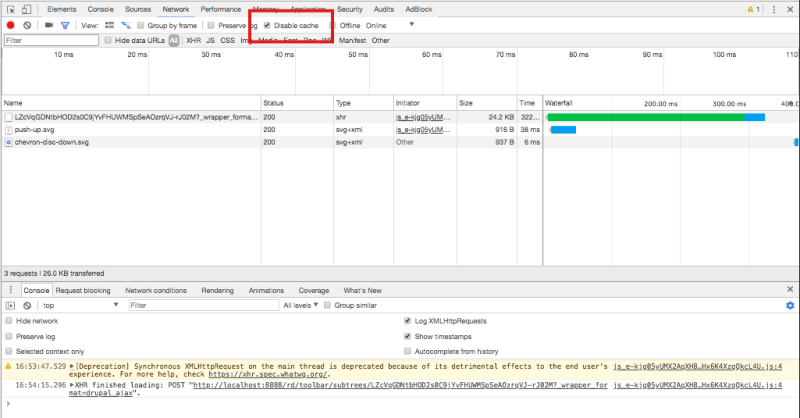
Disable browser caches
If you are not seeing your changes, make sure your browser is not caching your JavaScript files and clear your Drupal cache. In Google Chrome, you can go to the Dev Tools: Network Tab > Disable cache. In Firefox, Web Developer > Toggle Tools > Select the ... menu to access Settings > Advanced Settings > Disable HTTP Cache (when toolbox is open).
Image
Disable Drupal caches
To bypass the need to clear Drupal's cache manually all the time, go through the steps to Configure Your Environment for Theme Development which will disable various Drupal render and page caches as well as CSS and JS aggregation and turn on Twig debug mode which has additional advantages such as identifying which template is responsible for specific HTML output on the page.
After completing these steps, you won't need manually clear Drupal's cache to see changes from your JavaScript files. You'll only need to refresh the browser.
Recap
In this tutorial we created a new custom Drupal theme and a "Hello, World" React application and incorporated it into our theme. We learned about using asset libraries to attach external JavaScript libraries like React and Babel. We learned how to set up a JavaScript build toolchain with Webpack to preprocess JavaScript assets, and how to add a DOM element for React to bind to.
There is no one right way to accomplish this, and your exact setup will be dictated by your needs. Variations include whether the code should live in a theme or a module, and if you want to include additional processing steps in your toolchain. You should now understand enough of what's involved to set up a system that'll work for you.
Further your understanding
- Try to add a React component to the page via a custom module.
- Is there a different build tool you want to try? We recommend taking a look at Parcel and seeing if you can set up a toolchain similar to the one above with it.
- Add Webpack Hot Module Replacement (HMR) to a Drupal Theme
Additional resources
- Theme Drupal Sites (Drupalize.Me)
- Configure Your Environment for Theme Development (Drupalize.Me)
- What are Babel "plugins" and "presets"? (And how to use them) (fullstackreact.com)
- What exactly is BabelJs? Why does it understand JSX/React components? (quora.com)
- ES5, ES6, ES2016, ES.Next: What's going on with JavaScript versioning? (benmccormick.org)
- What Are Libraries? (Drupalize.Me)
- Define an Asset Library (Drupalize.Me)
- Attach a Library (Drupalize.Me)
- Hot Module Replacement in Webpack: Concept and Guide (webpack.js.org)
- Add Webpack Hot Module Replacement (HMR) to a Drupal Theme